Salvage Hounds Vol 2 is coming this fall! As we wait for the final release of this new 32 page book, I figured I’d put together a little behind the scenes feature. Today we’re going to look at how the art is created, from initial layout to final image.
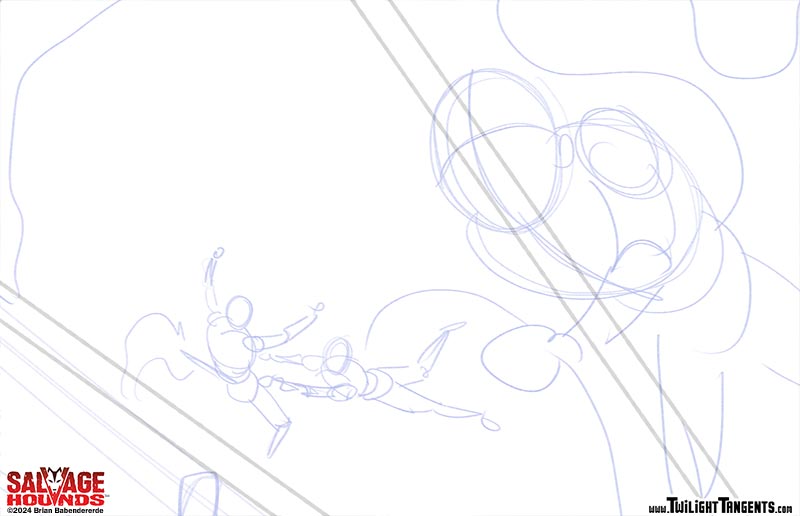
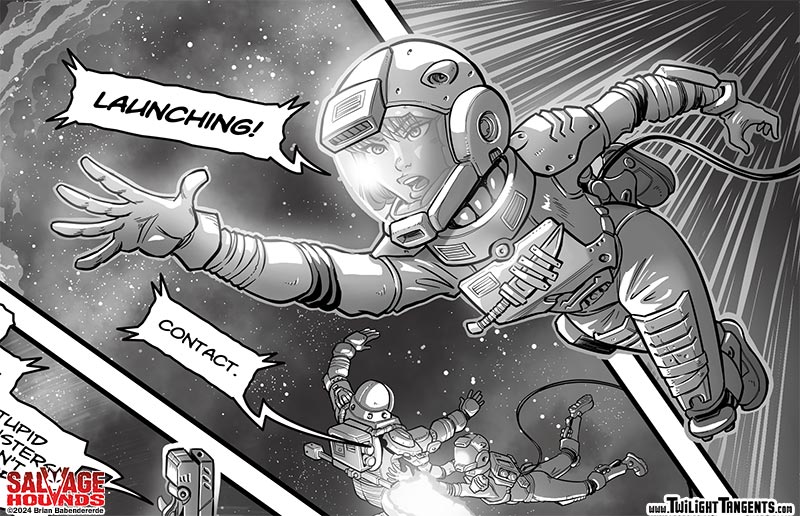
First up, here’s a shot of Mi-Cha leaping into action that I’ve shared before. Let’s start with the layout, which is a basic “chicken scratch” gestural sketch intended to figure out the action and thrust of the panels.

These initial layouts are obviously done pretty loosely. The next step is to refine the idea into something more tangible. The looseness of the original drawing is replaced by a more detailed but still rough concept.
After that, it’s time to turn that rough into a finished pencil. I’ve put together a slider image so you can compare the two stages. Note how much the final pencil changes as I work out more details and changed the overall orientation to give the figure more forward momentum.


Next is the inking stage. I keep my pencils pretty tight in terms of what I think the final inks are going to look like, so for me, inking is all about adding line variation and blacks to add depth or create more contrast, as well as adding some finer details. Here’s another slider where you can compare what I’ve done.


Finally, here’s the image as it appears in the final book.

Next up, let’s take a look at a shot of Olivia as she floats in zero-g on the Mutt. Use the slider to compare the rough pencil stage to the finished pencils. Notice how much the angle of her head and face changed as I refined the drawing to give it more of a sense of drama and depth. I also revised the hand for the same reason.


Now let’s take a look at the inking process. For a character like Olivia, I indicated the basic forms of her hair in the pencils, but I wait until the inking process to really work out the lighting by adding blacks.


After the inks comes the painting stage, where grays and effects are added to add depth and detail. Notice how adding just a few shapes of lights in the background gives some sense of not only depth, but also situates Olivia in a suggested environment.


Finally, let’s check out an example of how I create the space ship scenes for Salvage Hounds.
I’ve built the ships in 3D, and I use renders of those models to set up a shot like this one, where Olivia and Ana are heading to scout some wreckage. From there, I’ve drawn in first a rough and then a finished figure for Ana in her space suit, as well as added some wreckage and generally messed up the ship with more damage.


Next it’s time to ink. I still go in and hand ink all the ships, which means that they’re going to get a more natural and junky feel to them. First, I figure out where my deep shadows are going to be, based on where the light is coming from. I tend to avoid flat blacks, and instead like to get some subtle cross-hatching textures into the shadows for more flavor.
Use the slider to compare pencils to inks.


Finally, it’s time to finish off the scene with the grays and effects stage. Painting the space nebulae is always fun! I also like to go in and use bloom light in these scenes to add to the sense that the sun in bouncing off the hulls of these ships. Finally, adding details like the vernier thrusters and the name of the wrecked ship finishes off the panel.
Use the slider to compare the inks to the final panel.


That’s it for today. I’ll have more behind the scenes art coming soon, and look for Salvage Hounds Volume 2, coming this fall!

